# Events
Events monitor for specified criteria and can have one or more actions that are executed when that criteria is met. There are two categories of events; conditional and time based, with different types in each category.
Actions executed by an event are state dependent, meaning that if the same event is in more than one state, the event can trigger different actions for each state. Multiple actions can also be assigned to a single event and each of these actions is executed if the event occurs. Finally, each event in a state has a flag that indicates if this state is to be exited if the event occurs.
# Creating a New Event
Option 1: For a specific diagram
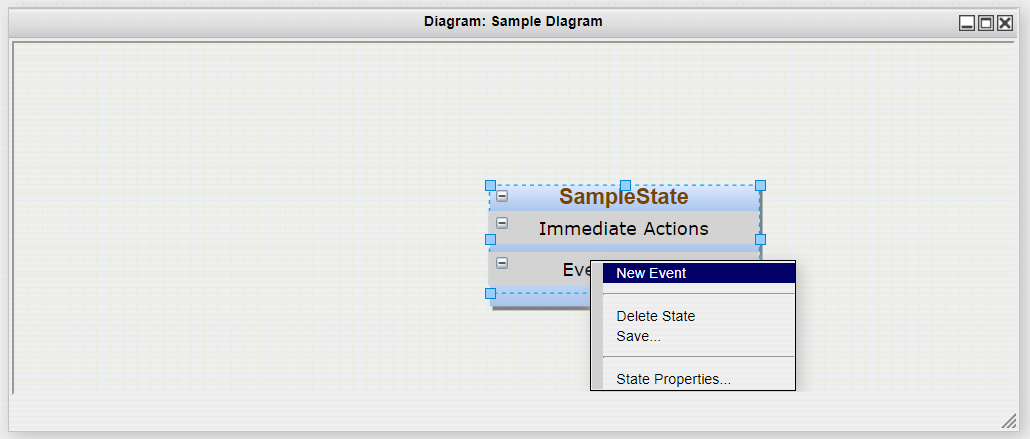
Open the Diagram you would like your event to be in. Locate the State you would like to add the event to and right-click on the "Events" label. Click "New Event."
Option 2: For use in multiple diagrams
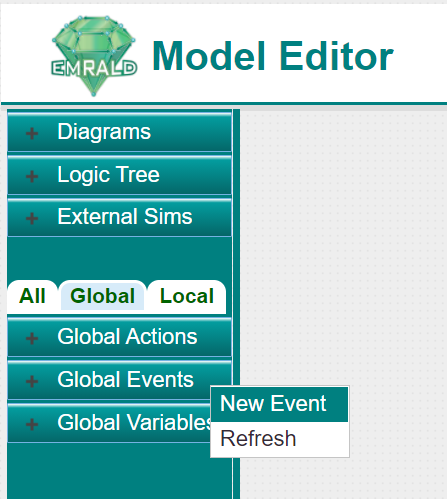
Although events can be created in a specific diagram, they can be used in any other diagram. It is best practice to create them using the "Global" tab in the left navigation panel.
Creating an event by right-clicking on the events tab marks the event so they will be listed in this tab. Drag and drop the event onto the "Events Actions" header of the desired state to add it as you would an existing event.
Continued for both options
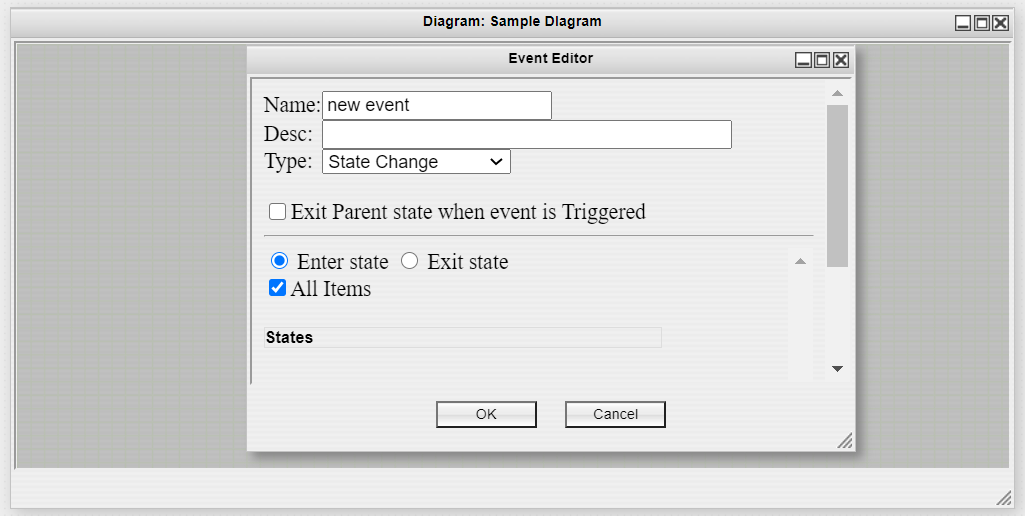
Fill out the dialogue box with the name, description, and type. Once a type has been chosen and the event saved, the type cannot be changed.
Depending on the type selected, different user options will be shown, see Types of Events below.
Once the required and desired fields are filled out press "OK".
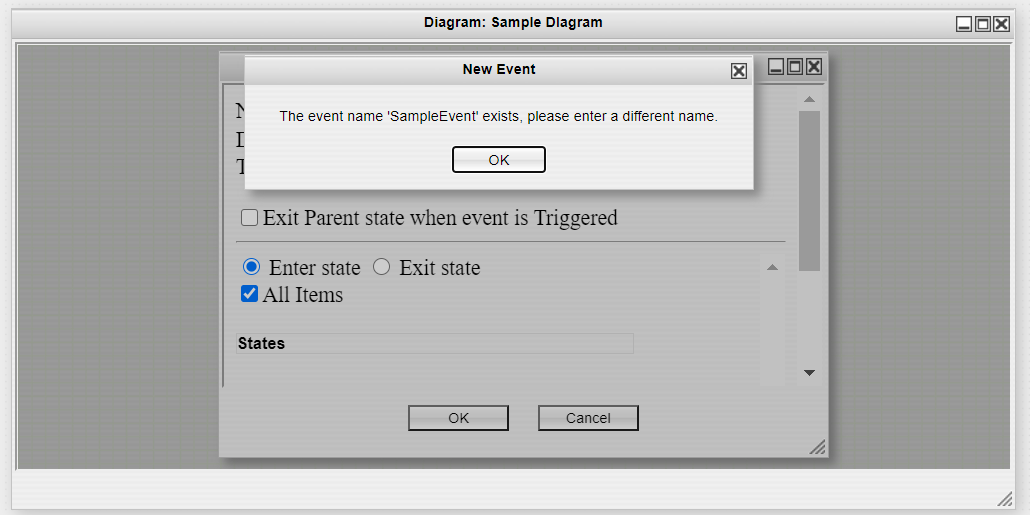
The name cannot be the same as any existing event in the model. If it is, a window will pop up to notify you to choose another name.
# Adding an Existing Event
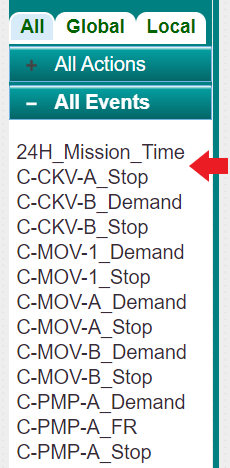
In the Left Navigation Frame, locate the event you would like to re-use. Click and hold on to the event and drag it to the Event Actions section until a plus symbol shows and release your mouse.
Note
Use the tabs to more easily find the desired event. "Local" items were created in the current diagram. "Global" were created from the side bar tab for use in any/all diagrams. "All" shows events for all the diagrams. See Modeling Pieces Tabs in the Web User Interface page for more information.
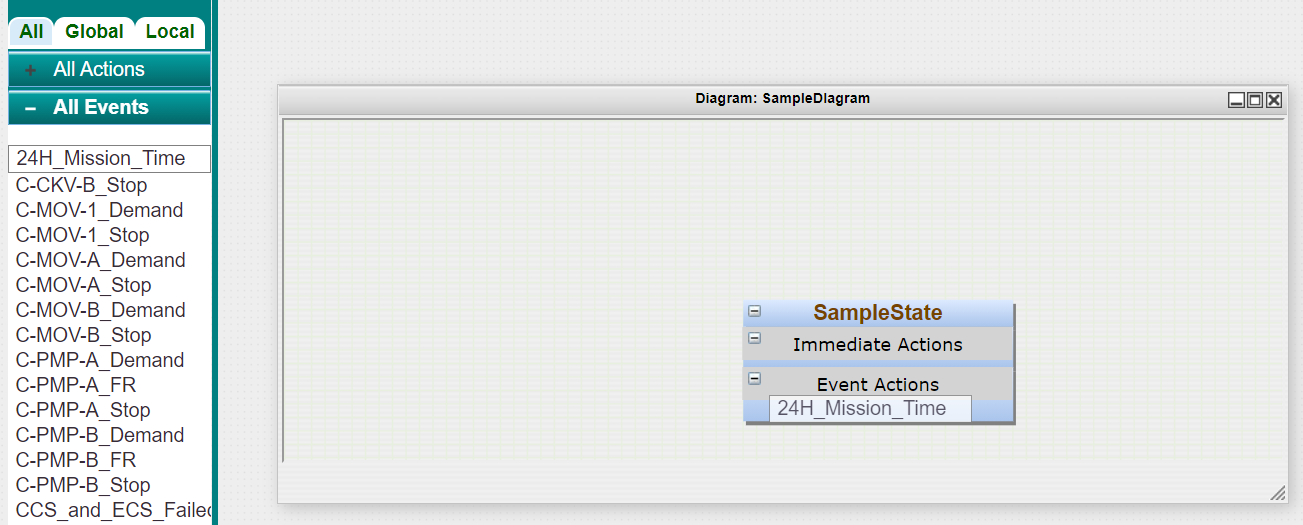
The event will appear in the Event Actions section.
# Editing an Event
Option 1:
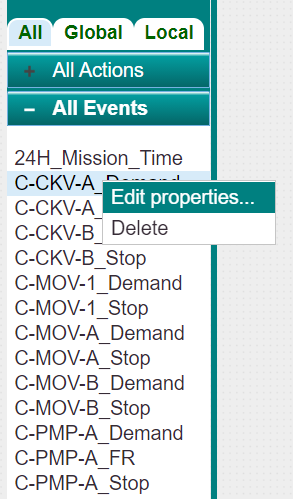
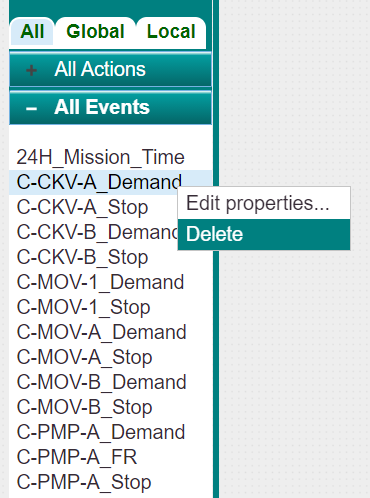
On the Left Navigation Frame, click on the tab (All, Global, or Local) where your event is located. If you are not sure which tab, click on the All tab. Right-click on the event and click "Edit properties...".
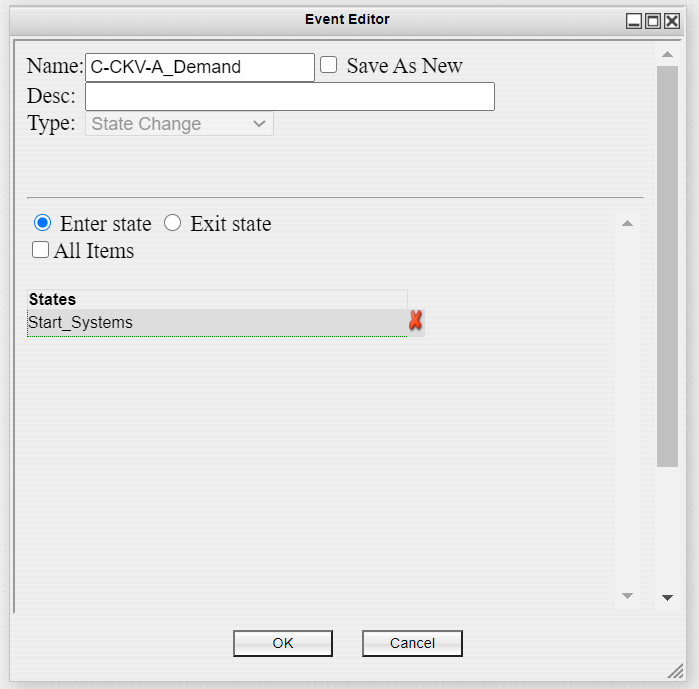
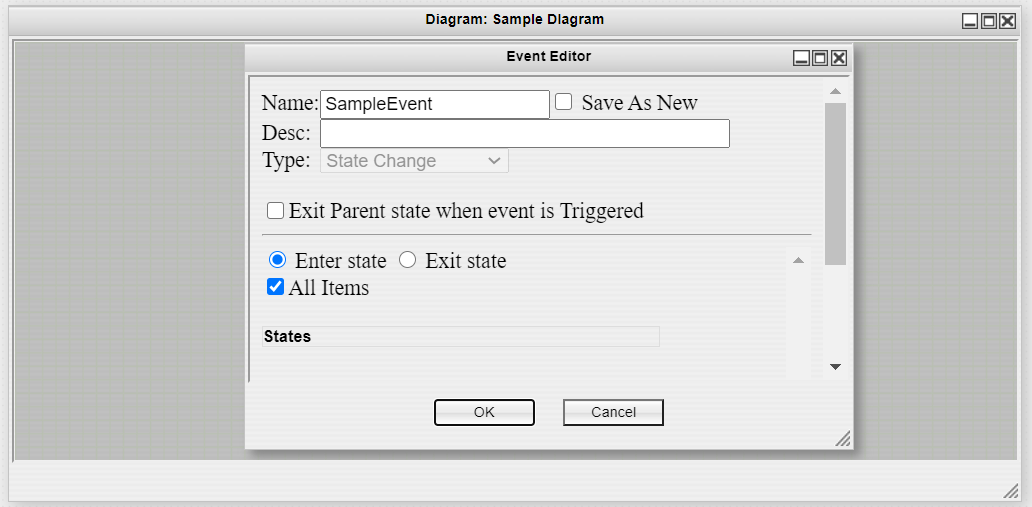
The Event Editor window will open up in the Modeling Area.
Option 2:
Open the Diagram containing the event and locate the event. Right-click on the event and click "Event Properties...".
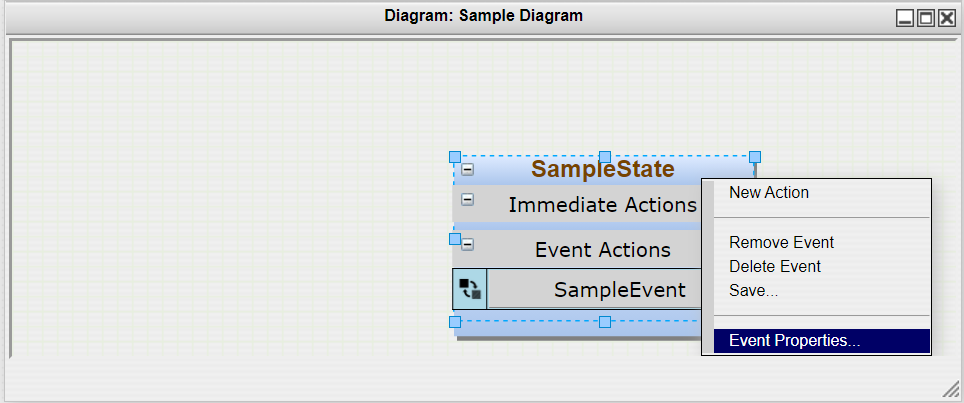
The Event Editor window will open up in the diagram window.
Continued for both options:
In the Event Editor window, the common fields amongst all event types are Name, Description, Type, and the option to Exit Parent state when event is triggered. Each will be described below.
- Name: Type the name of your event. This is how it will be shown and identified in the Left Navigation Frame and in diagrams. This is required.
- Desc: Type a description of your event. This is not required.
- Exit Parent state when event is Triggered: Check the box to indicate if the state is to be exited after the event has been processed. If a state is exited then it no longer watches for the other events in the state. This field, if selected, is shown in the graphic by an icon on the right side of the event by a door with exit arrow. Arrows exiting actions under the event will be solid black if it is selected and dashed green if it is not exiting. This option will appear in the editor window only when editing in a Diagram (Option 2) since you may want the state behavior to be different in different diagrams.

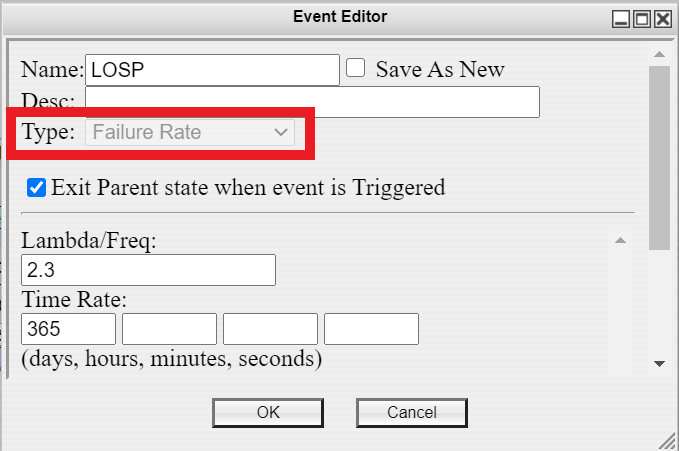
- Type: Choosing the event type can only be done while creating the event. Once it is saved, the "Type:" field cannot be changed and will be grayed out. See Types of Events for more information.
# Removing an Event
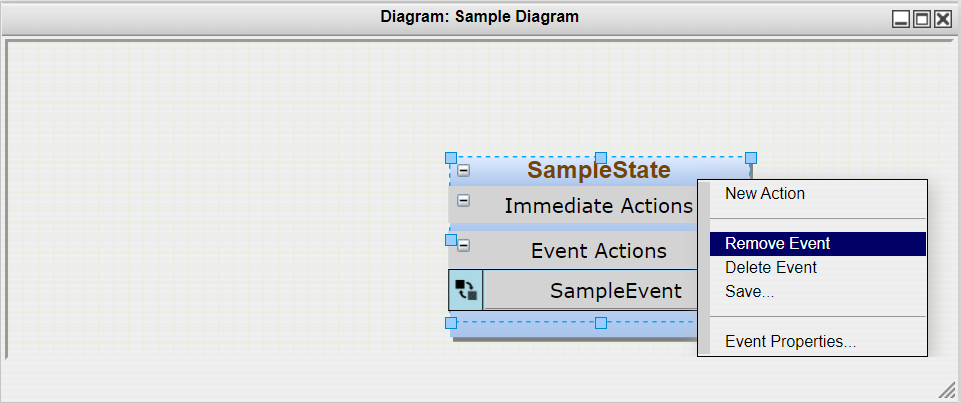
To remove an event from a particular state, but leave it in all others, right-click on the event and select "Remove Event".
# Deleting an Event
Option 1:
On the Left Navigation Frame, click on the tab (All, Global, or Local) where your event is located. If you are not sure which tab, click on the All tab. Right-click on the event and click "Delete".
A confirmation window will appear in the Modeling Area. Click "Yes."

The event will be deleted from the entire model and no longer be listed in the Left Navigation Frame. To only remove it from this state, use "Remove Event" instead.
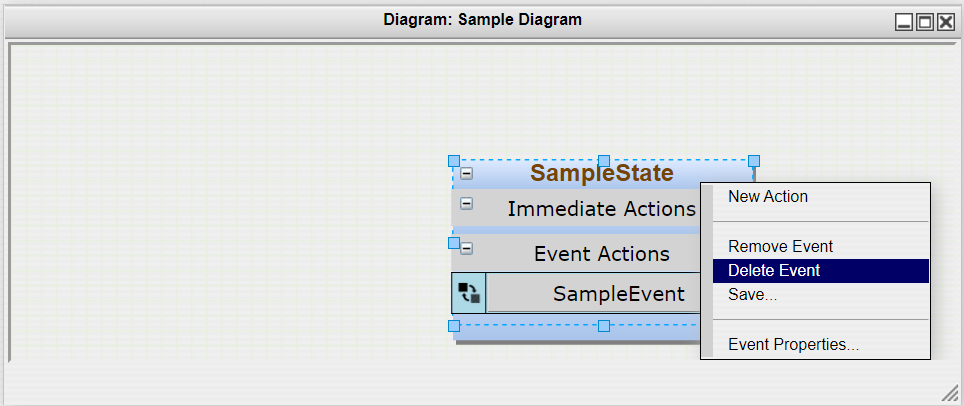
Option 2:
Open the Diagram containing the event and locate the event. Right-click on the event and click "Delete Event". Use caution when deleting because no confirmation window will appear.
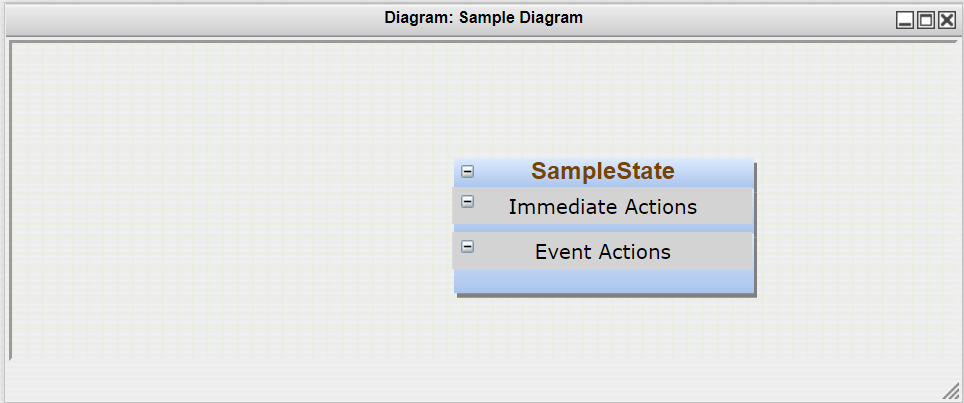
The event will no longer be listed in the state, will be deleted from the entire model, and no longer be listed in the Left Navigation Frame. To only remove it from this state, use "Remove Event" instead.
# Types of Events
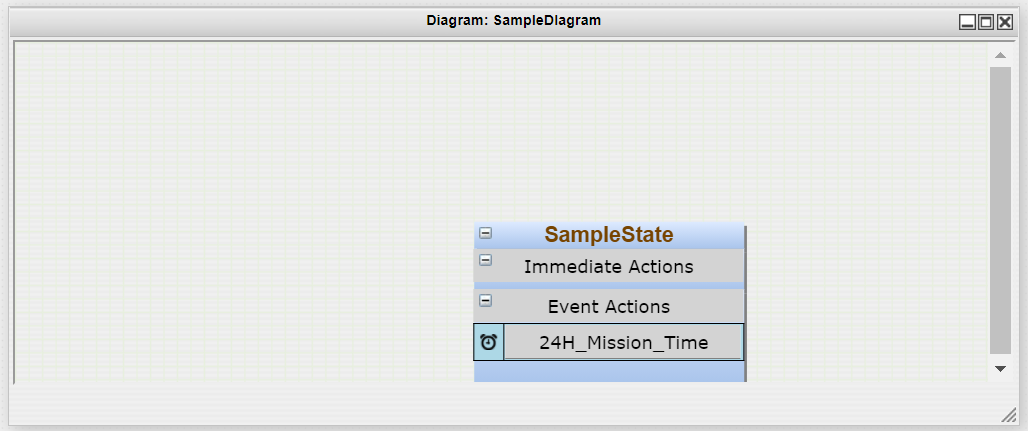
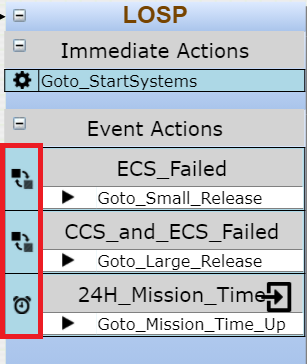
There are two categories of events: conditional and time based. The type of event is indicated by an icon to the left of the name in the Event Actions section in the state. Those icons are included in the title of the respective section as well as in the Icons: Events section.
To define the type of event, click the dropdown menu in the Event Editor then click the desired event type.
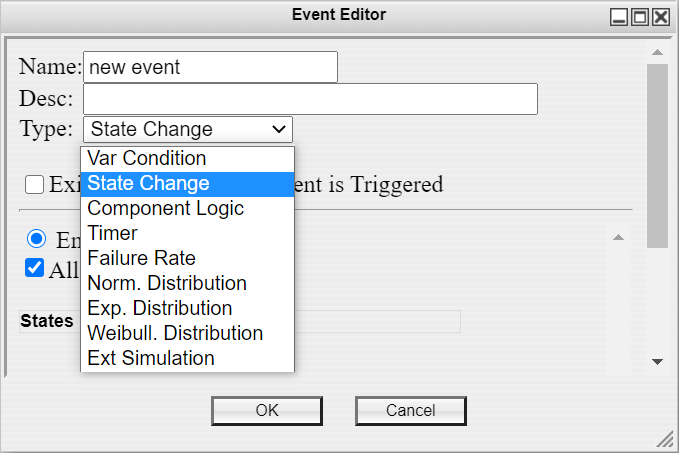
The options and fields below will change accordingly. The options and fields specific to each event type will be explained in their respective section below. Note that choosing the event type can only be done while creating the event. Once it is saved, the "Type:" field cannot be changed and will be grayed out.
# Conditional Events
Variable Condition 
Listed as Var Condition in the dropdown menu. Monitors variable values with user-defined code to determine event execution.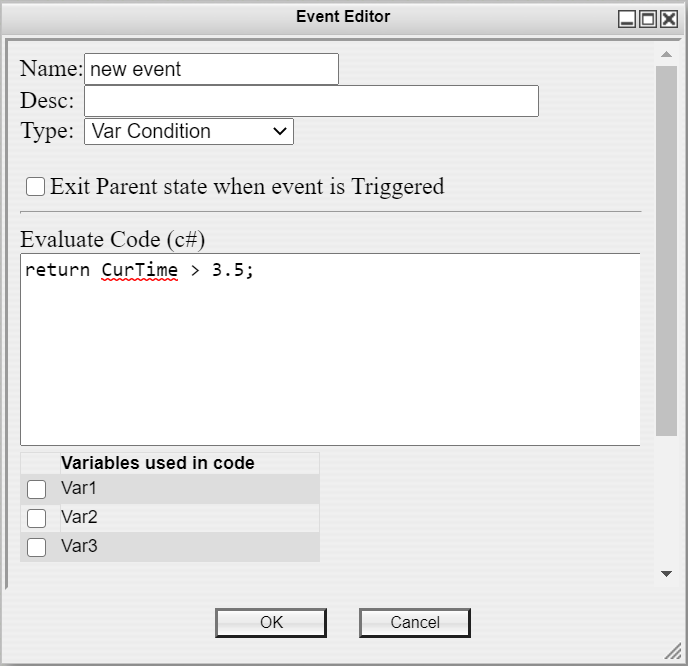
- Evaluate Code (c#): Type or copy and paste into this text field the C# code to evaluate to determine if this event is triggered. This must return a boolean true or false value.
- Variables used in code: A list of variables available in the model. Pre-existing variables such as CurTime are auto checked and always available. See Dynamic Scripts for more information. It will include the all of the variables that you create and are listed in the "All" Tab of the Left Navigation Frame. Click the check box to identify which variables are used in the code.
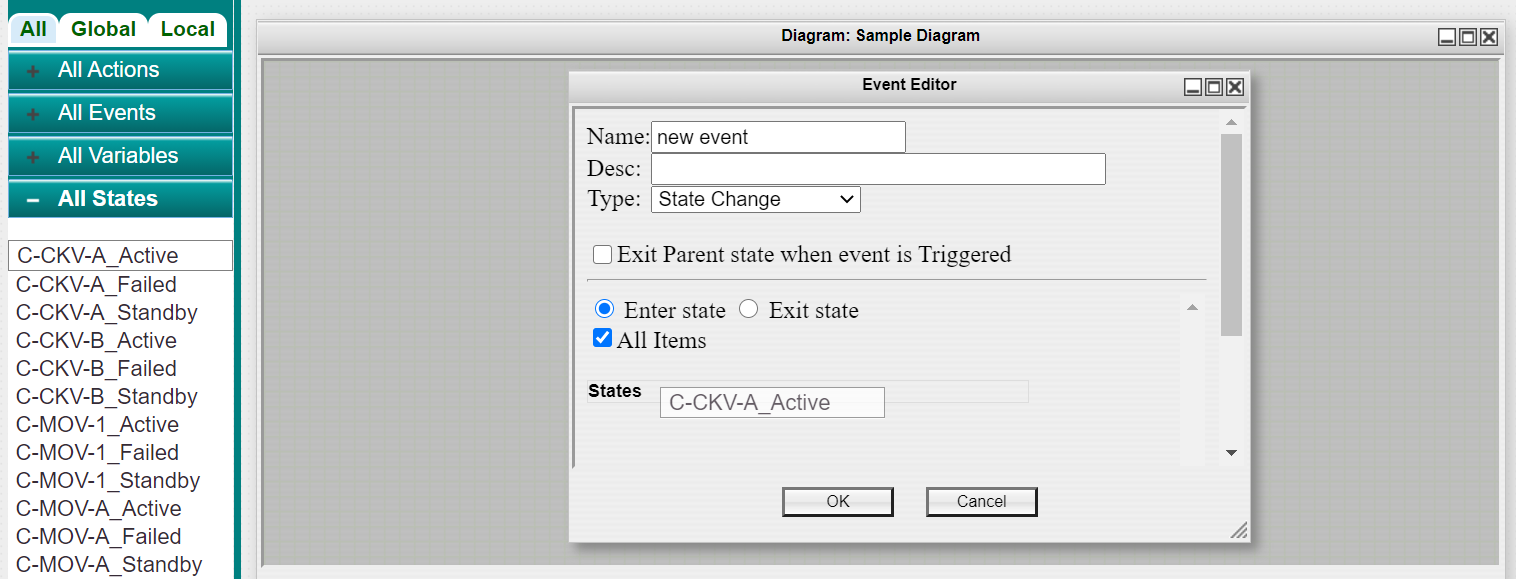
State Change 
Monitors when entering or exiting a specified state to determine event execution.
- Enter State/Exit State: Select "Enter state" if you would like the event to be triggered when the states listed in the event are entered. Select "Exit state" if you would like the event to be triggered when the states listed in the event are exited.
- All Items: Check this box to require all states listed to be entered or exited in order for the event to trigger. Leave it unchecked if entering or exiting only one of the states is required to trigger the event.
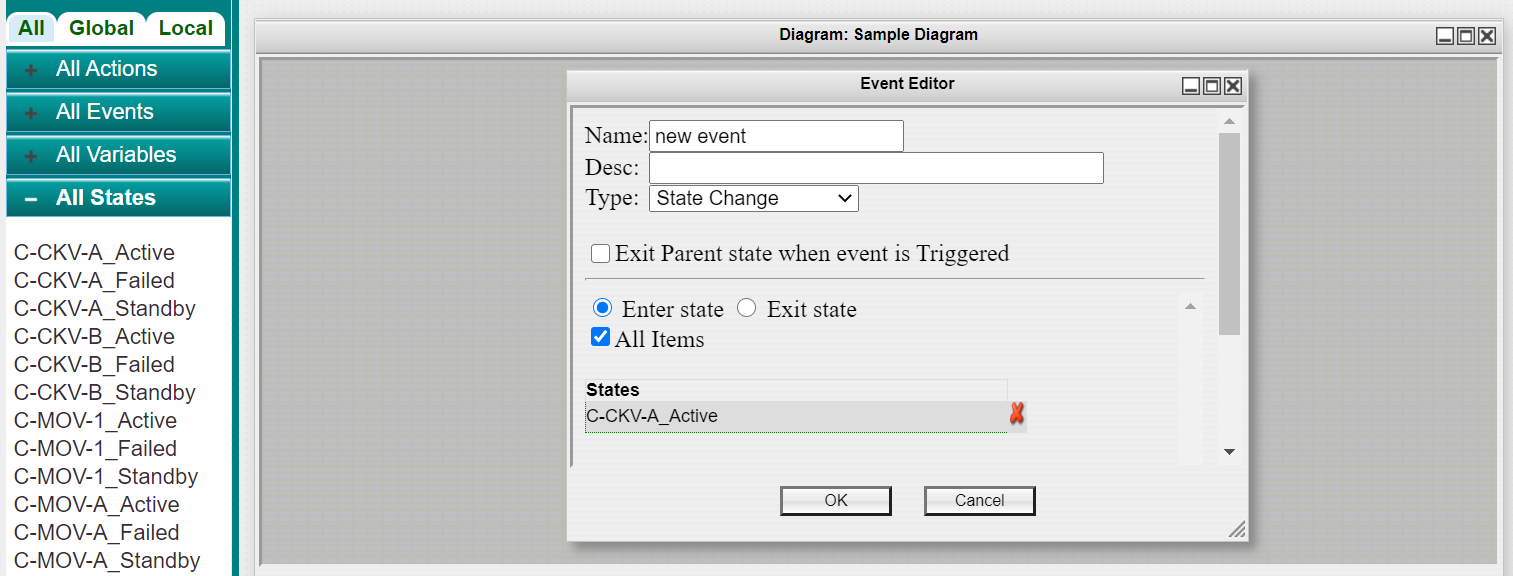
- States: The list of states that you would like to monitor. To populate the list, drag existing states from the Left Navigation Frame to this list.
In the Left Navigation Frame, locate the state you would like to monitor. Click and hold on to the event and drag it to the States list title until a plus symbol shows and release your mouse.
The event will appear in the States list.
Component Logic 
Evaluates a logic model of component diagrams to determine event execution.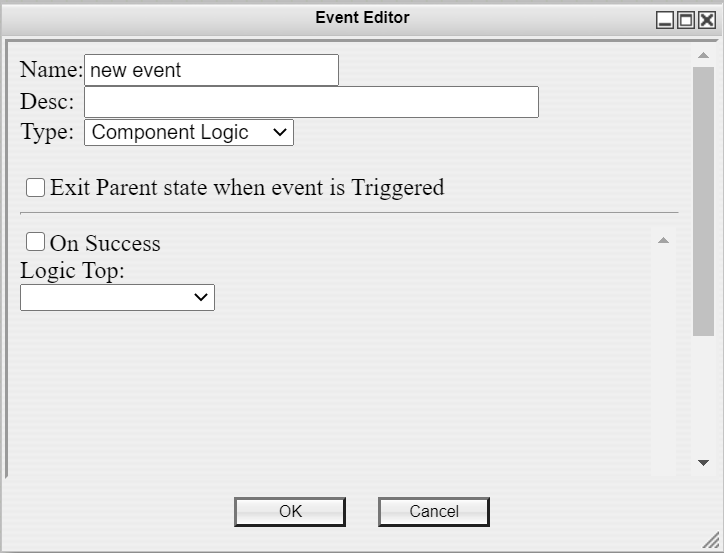
- On Success: Check this box if you want to trigger the event upon success of the Logic Tree evaluation, default is failure of the logic tree.
- Logic Top: Click the field to expand the dropdown menu containing all of your Logic Trees. Click on the Logic Tree you would like evaluated when the event is triggered.
External Simulation 
Listed as Ext. Simulation in the dropdown menu. This event is triggered when the assigned variable is modified by and external simulation and the evaluation code returns true.For example, you want to trigger the event when a tank is over 2 meters full so you have created a new "Ext Sim Variable" named "Height" to monitor the tank fill height. When "Height" gets modified by the external simulation, you would put the code "return Height > 2;". See External Simulation Variables for more information.
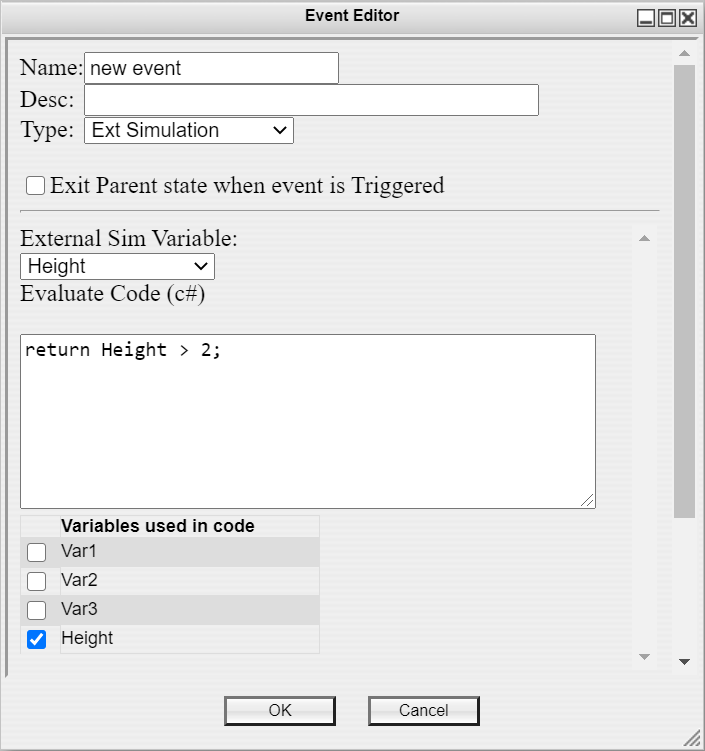
- External Sim Variable: Click the field to expand the drop down menu of external simulation variables you created in the model. Select the one that will change when this event could be triggered. One must be selected in order to create the event.
- Evaluate Code (C#): Type or copy and paste into this text field the C# code to evaluate to determine if this event is triggered. This must return a boolean true or false value.
- Variables used in code: A list of other variables available in the model for use in evaluating the code. Pre-existing variables such as CurTime are auto checked and always available. See Dynamic Scripts for more information. It will include the all of the variables that you create and are listed in the "All" Tab of the Left Navigation Frame. Check box to identify which variables are used in the code.
# Time Based Events
Timer 
Monitors the time after entering the parent state against the user specified or sampled time. This can be set to a static value or to a variable value. The fields will change form depending on what type of value you are setting it to. Leave the checkbox next to "Use Variable?" blank to set a static value or check it to use a variable value.# Static Value Timer
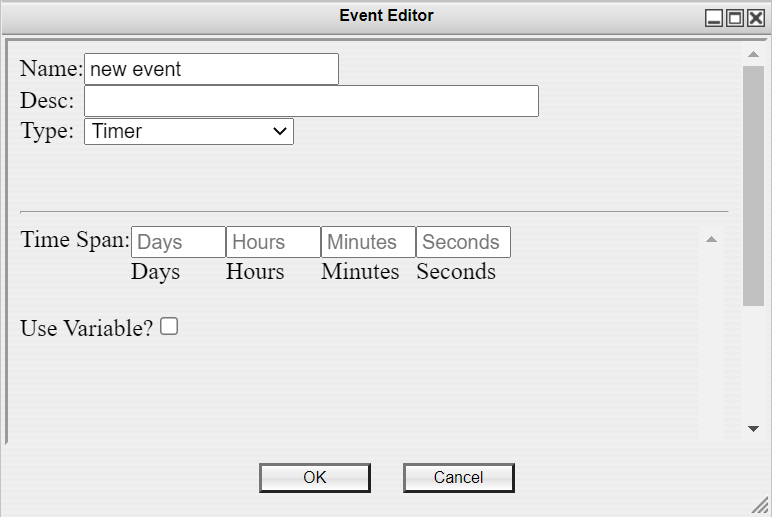
- Time Span: Enter the amount of model time to pass after entering this state before the event actions are triggered. The first box is the number of days, the second is the number of hours, the third is the number of minutes, and the fourth is the number of seconds. Values can only be integers.
# Variable Value Timer
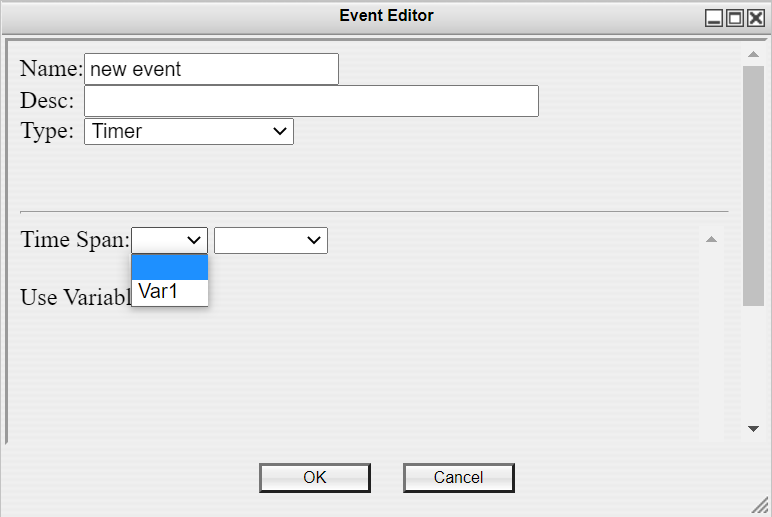

- Time Span: Enter the amount of model time to pass after entering this state before the event actions are triggered. The first field is the variable value you would like to use. The second field is the time unit you would like to use. Click the field to reveal the dropdown menu of options then click your desired selection to set it.
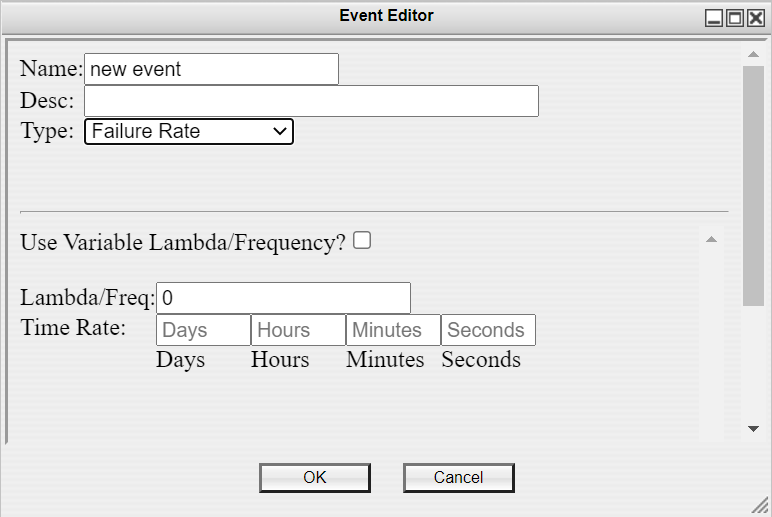
Failure Rate 
Samples a given probability of failure (P(t) = e^(-lambda*t)) to determine the time (t) of this event. The lambda or frequency value can be set to a static value or to a variable value. The lambda/frequency field will change form slightly depending on what type of value you are setting it to. Leave the checkbox next to "Use Variable Lambda/Frequency?" blank to set a static value or check it to use a variable value.# Static Failure Rate
# Variable Failure Rate

- Lambda/Freq: The frequency (instances) of this event occurring per the time rate defined. Likely a decimal value like 0.0003. If you choose to have it as a static value, checkbox unchecked, type in the value into the field. If you choose to have it as a variable value, checkbox checked, click the field to reveal the dropdown menu of variables available in your model and click the variable to set it.
- Time Rate: Enter the time rate that the frequency is sampled over. The first box is the number of days, the second is the number of hours, the third is the number of minutes, and the fourth is the number of seconds. Values can only be integers.
Normal Distribution 
Listed as Norm. Distribution in the dropdown menu. Samples a normal distribution according to user specified parameters for when this event will occur from the time entering the state.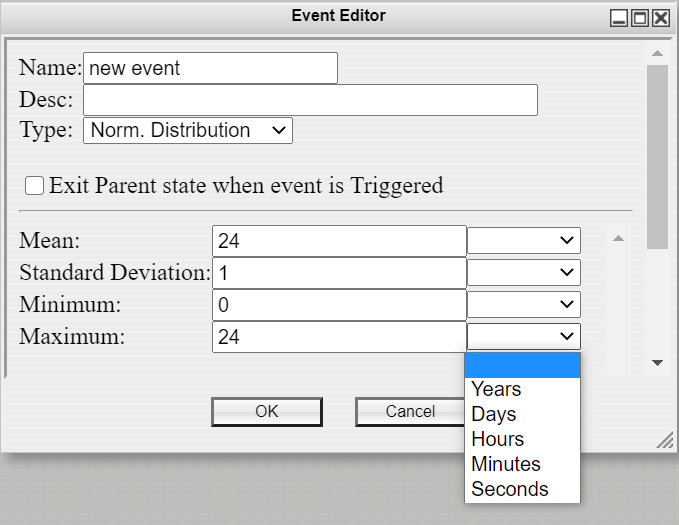
To the right of each value is a dropdown menu which includes various time units. Click the dropdown menu to expand it and click the unit you would like to use for that value. It can be unique for each value. This is the case for all of the following distribution events with time units.
- Mean: Enter the value of the mean.
- Standard Deviation: Enter the value of the standard deviation.
- Minimum: Enter the minimum value of the function, if a sampling returns a value less than this, then this time will be used. (Typically zero as you can't take no time to do something.)
- Maximum: Enter the maximum value of the function, if a sampling returns a value greater than this, then this time will be used.
Exponential Distribution
Samples an exponential distribution according to user specified parameters to generate a value for when this event will occur from the time entering the state.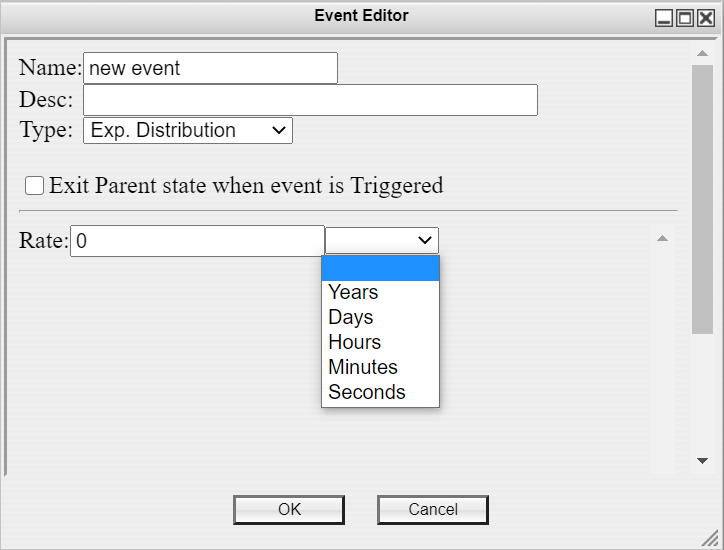
- Rate: Enter the value of the rate. To the right of the value is a dropdown menu which includes various time units. Click the dropdown menu to expand it and click the unit you would like to use for that value.
Weibull Distribution
Samples a Weibull distribution according to user specified parameters to generate a value for when this event will occur from the time entering the state.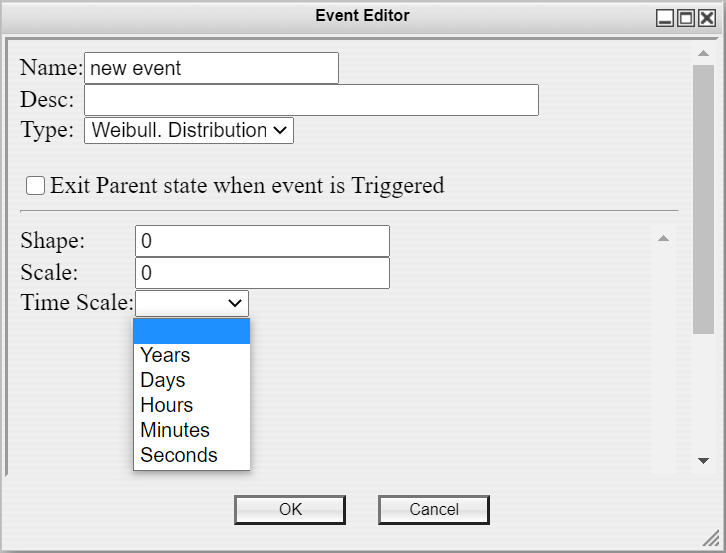
- Shape: Enter the value of the shape.
- Scale: Enter the value of the scale.
- Time Scale: Click the dropdown menu to expand it and click the unit you would like to use for this distribution.
Log Normal Distribution
Listed as LogNorm. Distribution in the dropdown menu. Samples a log-normal distribution according to user specified parameters to generate a value for when this event will occur from the time entering the state.
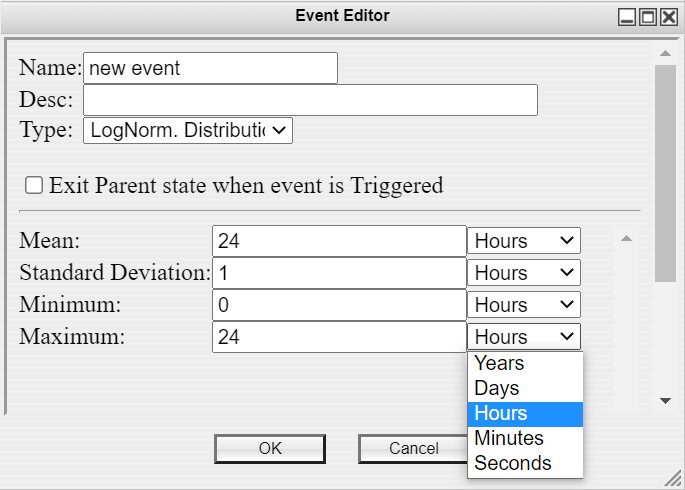
- Mean: Enter the value of the mean.
- Standard Deviation: Enter the value of the standard deviation.
- Minimum: Enter the minimum value of the function, if a sampling returns a value less than this, then this time will be used. (Typically zero as you can't take no time to do something.)
- Maximum: Enter the maximum value of the function, if a sampling returns a value greater than this, then this time will be used.