# Variables
Variables define a value that can be evaluated or modified by user defied scripts in some events and actions. External variables are linked to an external code and can be modified or evaluated by either.
# Creating a New Variable
On the Left Navigation Frame, right-click on the variable label and click "New Variable". This can be done from either the All tab or the Global tab.
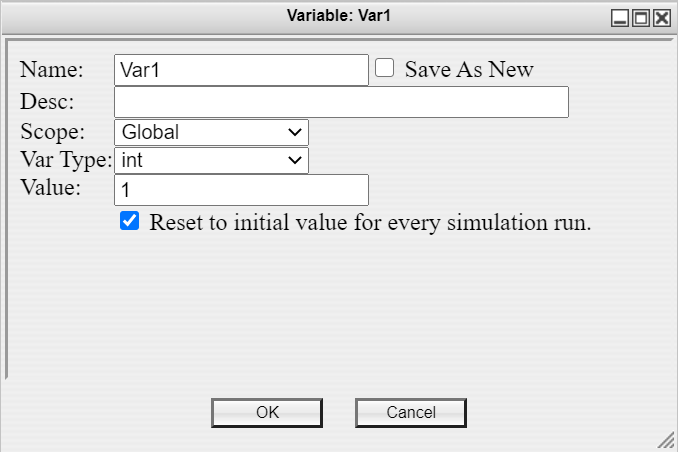
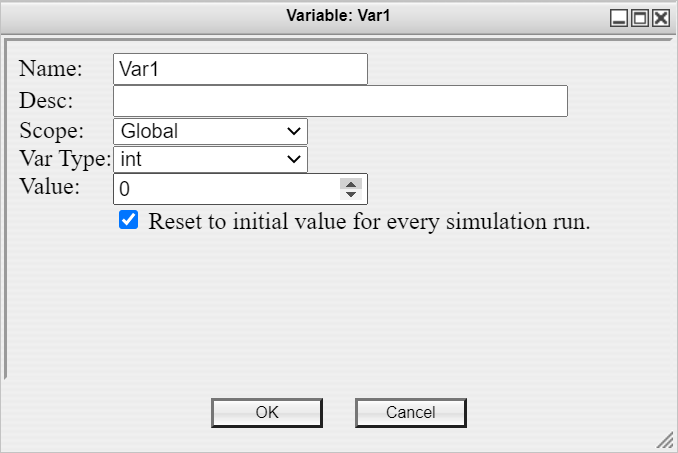
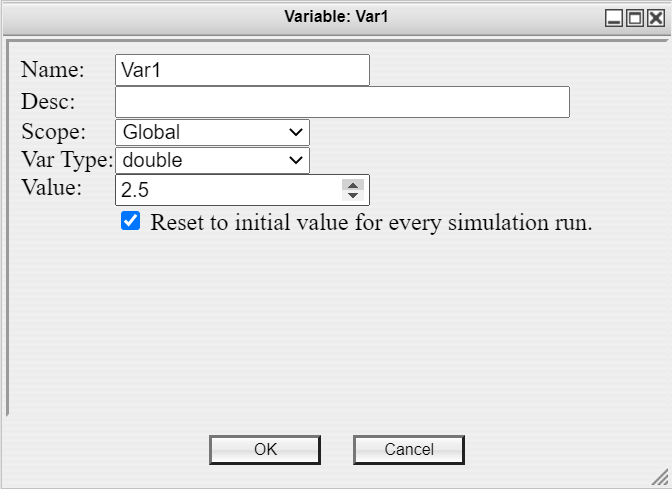
Fill out the dialogue box and press "OK". Each field is described in detail below.

Name: The name of the variable, how it will be listed in the Left Navigation Frame and be used in code.
Description (Desc): Optional description of the variable.
Scope: Click the field to define the variable as a Global variable or an External Simulation variable.
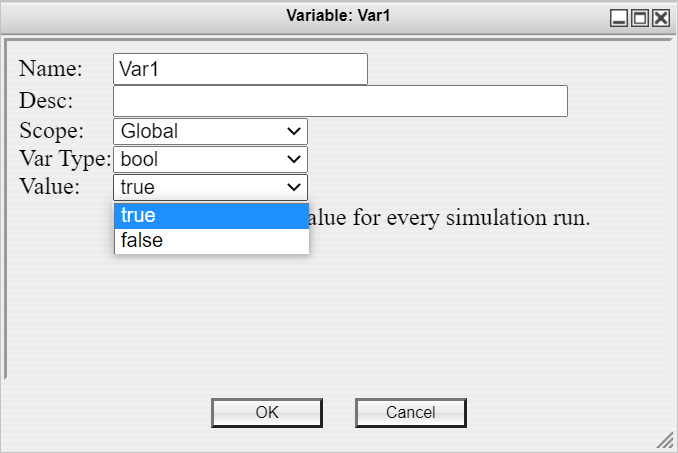
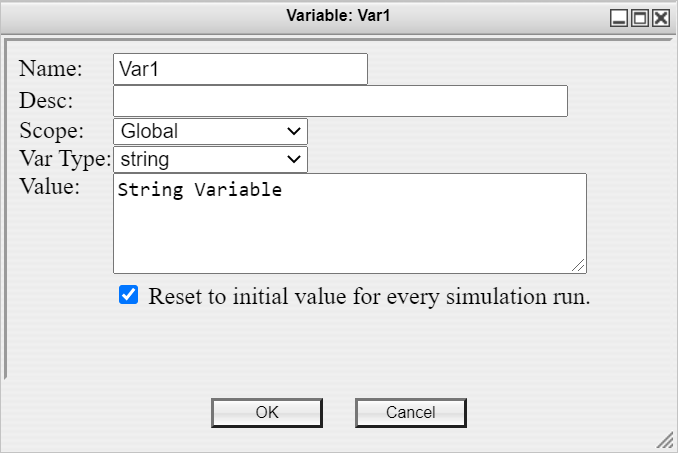
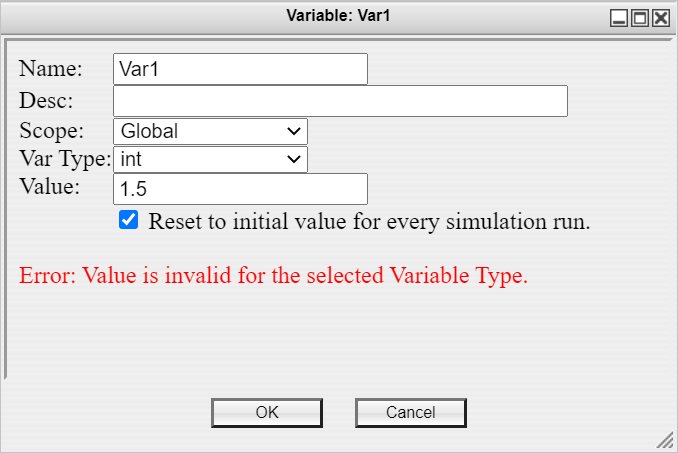
Variable Type (Var Type): Click the field to define the variable as an integer, double, boolean, or string.
Value: The initial value of the variable. It can also accept values in the form: 0E+/-00.
Reset to initial value for every simulation run: Check the box to have the variable reset to the initial value at the beginning of every simulation run.
It will be listed in the Left Navigation Frame.
# Editing a Variable
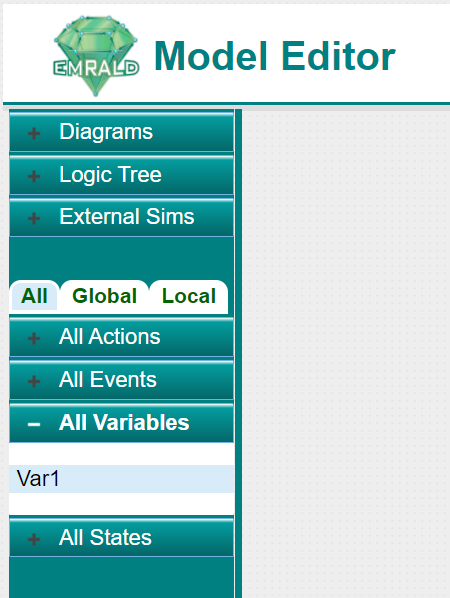
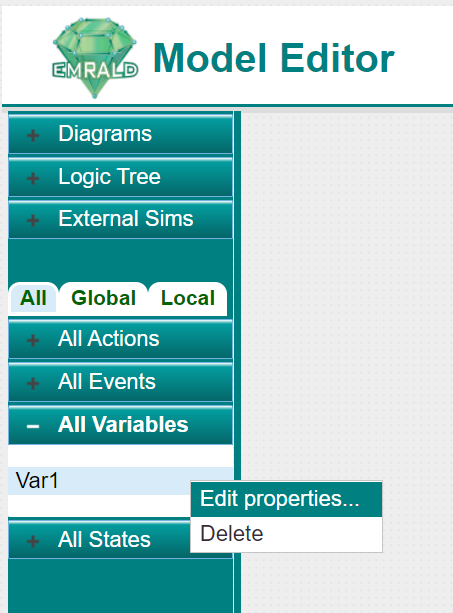
On the Left Navigation Frame, click on the tab (All or Global), External Sim Variables will not show up in the Global tab. If you are not sure which tab, click on the All tab. Right-click on the variable and click "Edit properties".
The variable properties dialogue box will appear in the modeling area. Edit your properties as needed and press "OK" to save the changes.
If you would like to create a new variable based on this one, check the box "Save As New." Then after you are done editing the variable, click the "Save As New" button which was previously the "OK" button.
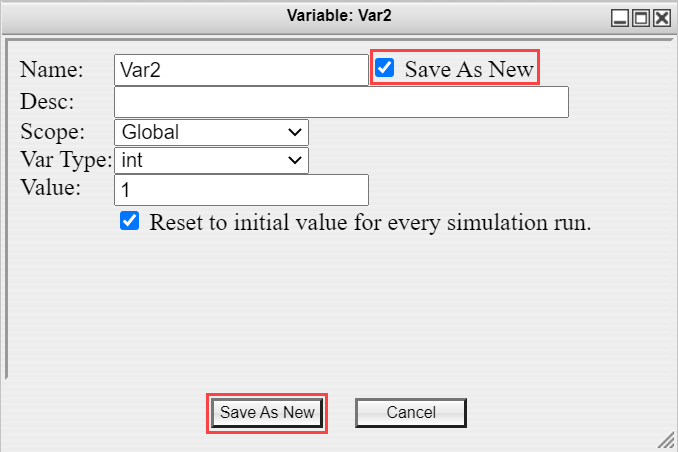
It will be listed in the Left Navigation Frame.
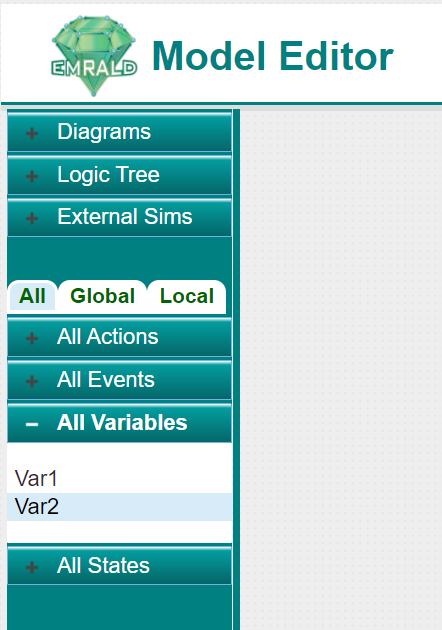
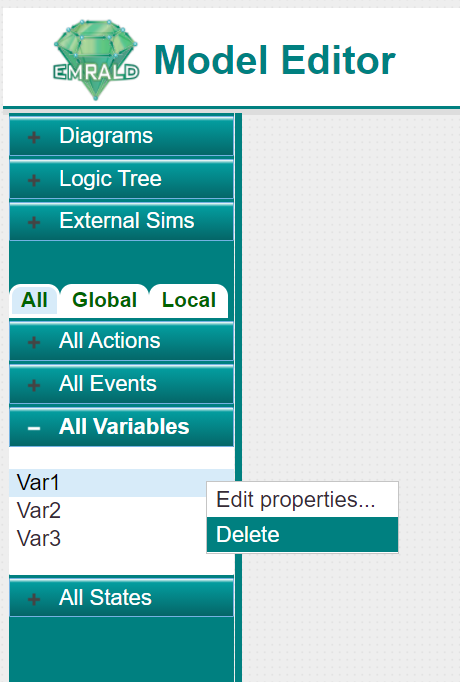
# Deleting a Variable
On the Left Navigation Frame, click on the tab (All or Global) where your variable is located. If you are not sure which tab, click on the All tab. Right-click on the variable and click "Delete".
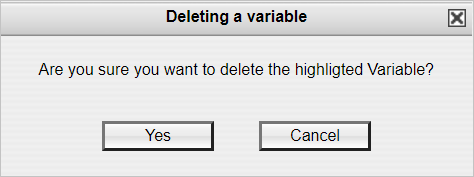
A confirmation window will appear in the Modeling Area. Click "Yes."
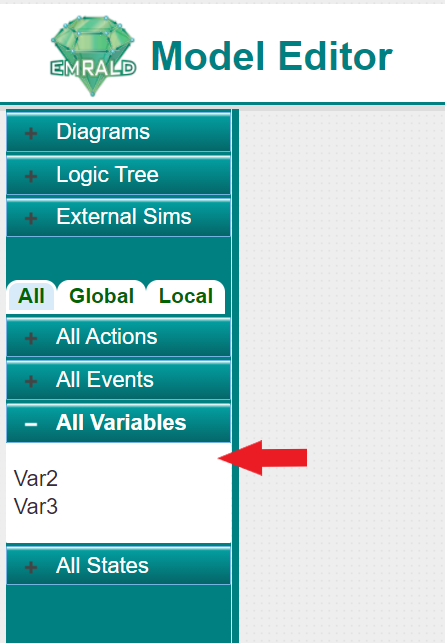
The variable will be deleted from the entire model and no longer be listed in the Left Navigation Frame.
# Using Variables in the Model
Whether you're identifying or adding variables to a Variable Condition Event or Change Variable Value Action, there will be a list of variables available in the editor window.
| Variable Condition Event | Change Variable Value Action |
|---|---|
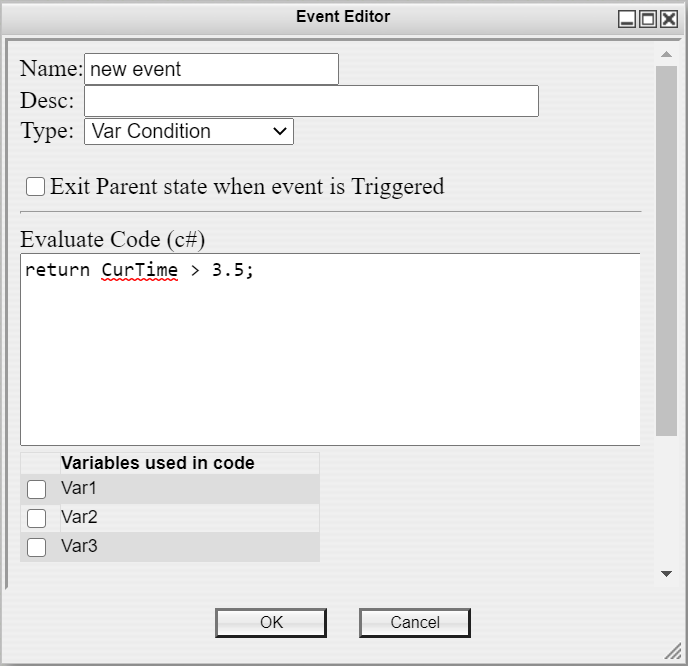 | 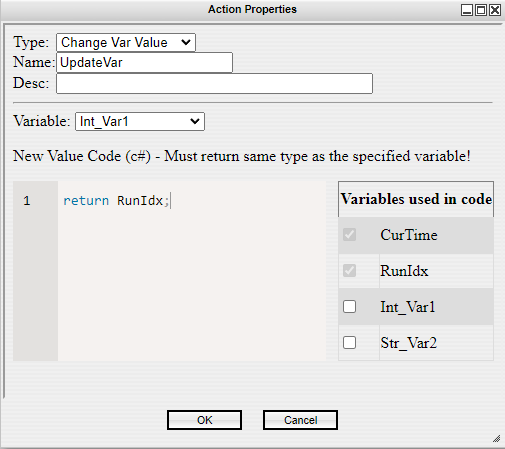 |
This list will not include pre-existing variables such as CurTime. See Dynamic Scripts for more information. It will include the all of the variables that you create and are listed in the "All" Tab of the Left Navigation Frame. Check the box(es) to identify which variables are used in the code.
See Variable Condition Event under Conditional Events and Change Variable Value Action under Types of Actions for more information on those respective topics.
# Variable Scope
Depending on the Scope of variable selected, different options are available.
# Global
Currently all variables are technically global, variables local to a diagram were available originally, but proved unnecessary and confusing. Global variables are normal variables and available in any item that has a script.
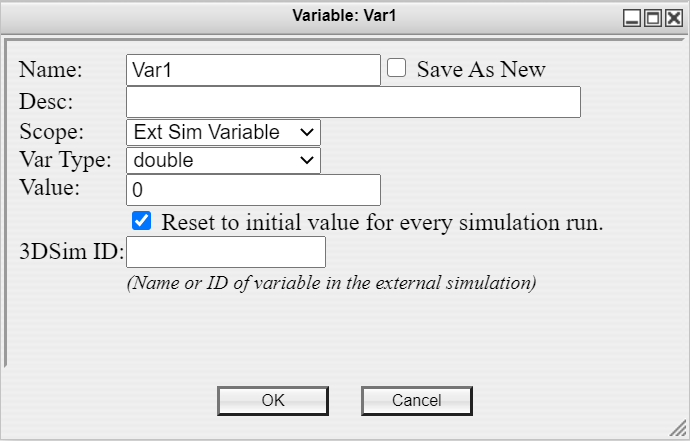
# External Simulation Variables
Seen as "Ext Sim Variable" in the drop down menu. An external simulation variable is a connected between the EMRALD simulation and an external simulation through the messaging protocol for sending or receiving values. These variables are used by the following items:
- External Simulation Event: See External Simulation Event under the Conditional Events section for more information.
- External Simulation Message Action: See External Simulation Message Action in the Types of Action section for more information.
When using an external simulation variable, it is required to provide the 3DSim ID or the name or identifier of the variable you which to use from the external simulation. This field will appear when the scope is changed to Ext Sim Variable.
# Document Link Variable
A document link variable is referring to or setting the value of a variable in an external file or document. This can be used in situations where you want to use and store values in a separate document for use in multiple EMRALD models or if you want to draw data from output files created by an external executable. The editor window for a document link variable has additional fields which are shown and explained below.
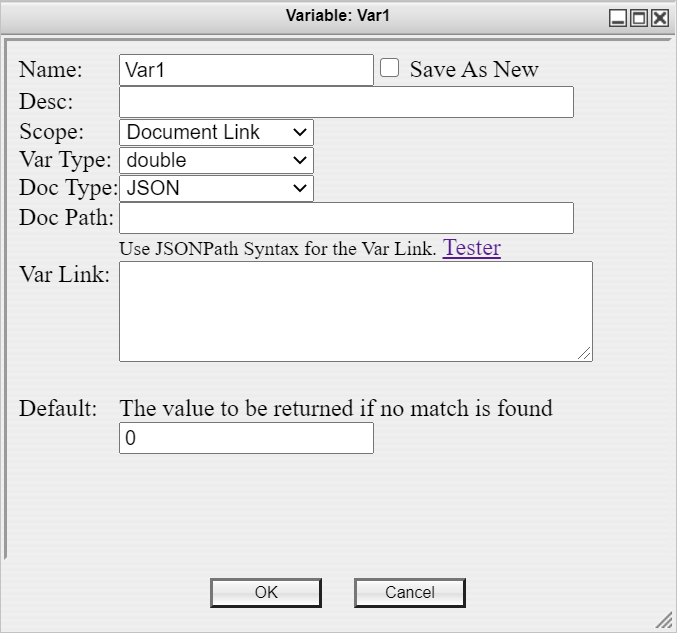
- Document Type (Doc Type): Click the dropdown menu and select one of three options for the document type that your variable is in: XML, JSON, and Text RegEx (text file using regular expression). Make sure to change this document type before proceeding to fill out any of the other fields as this will change the Tester link to be discussed in that following bullet point.
- Document Path (Doc Path): Type or copy and paste the path to the document. For example, C:\Projects\EMRALDVariables\DocLink.json.
- Tester: Click this link to test if your variable link, to be put in the following field, works properly. This link will bring you to a website that will allow you to input your document and expression for testing.
- Variable Link (Var Link): Identify the variable in the document using the matching syntax to the document type you are using. For example, if your document type is a JSON file, use JSONPath syntax. The Tester link includes an example of how to link to the variable from your document in the corresponding syntax. There are two extra settings available for linking to a text file using regular expression explained below.
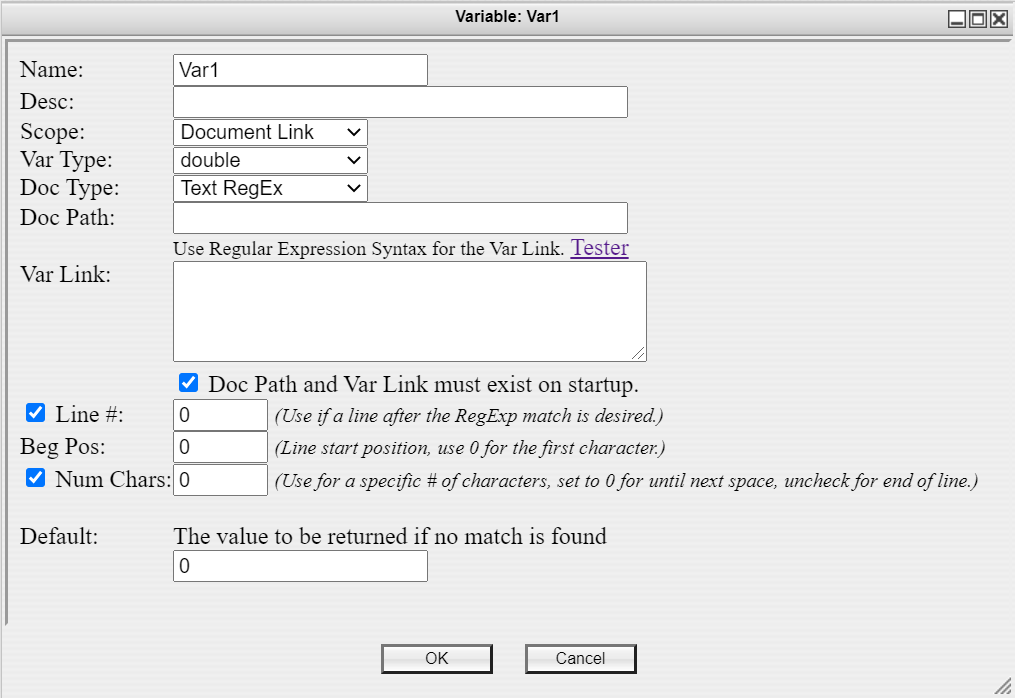
- Doc Path and Var Link must exist on startup: Check this box if the document and link must exist upon startup of the simulation. A situation in which you would not want this checked is if the document is created in the running of the EMRALD model when an external executable is triggered/coupled to and a variable from that output file is to be used.
- Line #: Check this box if you would like to use the value in a line after the regular expression match rather than the same line as the regular expression match. Indexing begins at 0 so you would use 0 to indicate the same line and 1 to indicate the next line. When this box is checked, two additional settings appear. Beginning Position and Number of Characters.
- Beginning Position (Beg Pos): This is the line start position. Indexing begins at 0. To use the first character in the line, type 0.
- Number of Characters (Num Chars): Use this to indicate the relative position of the last character you would like to extract. Set this value to 0 to only use the character in the beginning position, 1 if you would like to use the first two characters starting with the one in the beginning position, and so on. Do not check this box if you would just like to select everything up through the end of the line.
- Default: The value to be returned if no match is found in the document via the variable link.
# Accrual Variable
An accrual variable allows the user to easily adjust a variable depending on how much time is spent in specified states. For example determining a radiation dose rate or costs for procedures or downtime. Accumulation variables are always doubles. Follow these steps to set up an accural variable.
The initial editor screen when changing the scope to Accrual immediately changes and locks the variable type as a double. It also shows a blank table of State Accrual Variables. These are the states that will influence the value of the variable depending on how long the state is occupied.
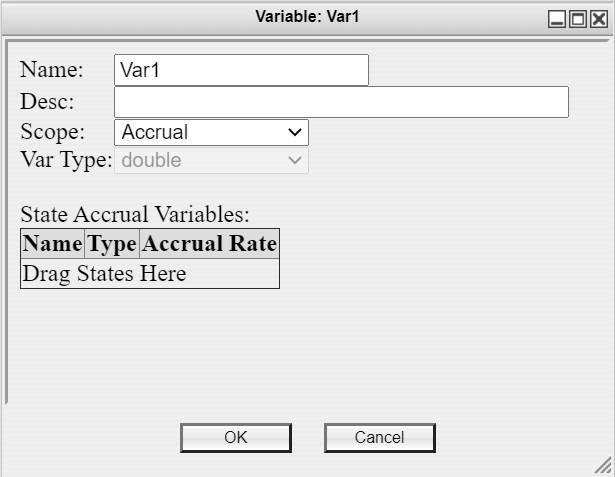
To add a state to the tabulated list, click and drag the state of interest from the Left Navigation Frame to the area where it says Drag States Here. Release your mouse once a small plus sign appears.
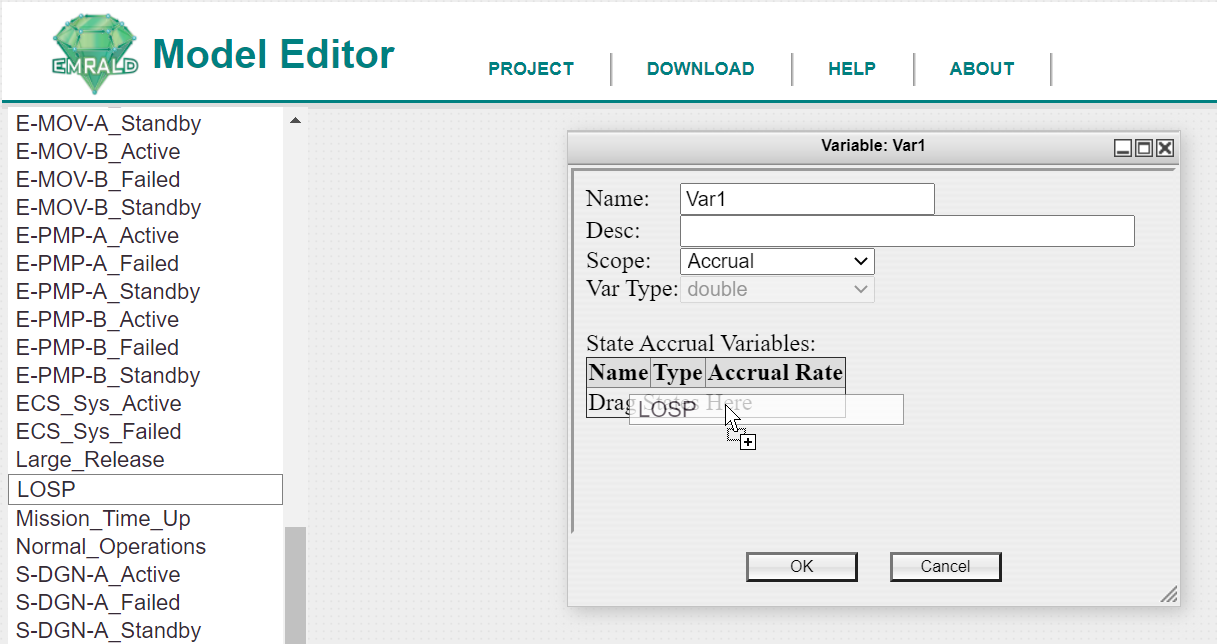
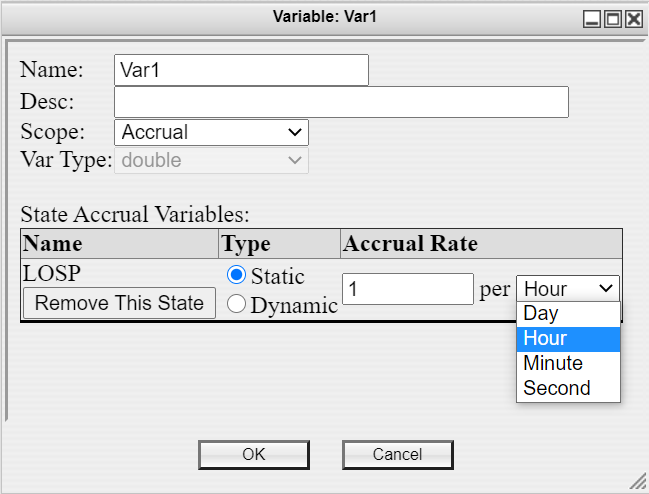
The state should also appear in the table. You will have the option to make it either a Static or Dynamic response. The default is Static which means that the Accrual Rate is constant. The Accrual Rate is the rate at which the variable increases based on the time spent in the state. The value input is the amount the variable will accrue per the time unit on the right. The unit can be changed as seen in the dropdown menu between days, hours, minute, and seconds.
To switch to the Dynamic type, select the radio button for "Dynamic." The Dynamic type means that the accrual rate will vary with respect to the simulation time passed. For example, if you want the accrual rate to change after the first ten hours of simulation time, you can define the rate for the first ten hours then the rate for the remaining time. The simulation time is the time at which the accrual rate changes to the value input. This rate will carry out for the rest of the simulation time unless otherwise specified. Like in the Static type, the unit can be changed for both the simulation time and accrual rate. When the unit is changed for one, it will change it for both. They must be the same unit.
As you can see, there is no area immediately present to add values in for the rate. Click the button "Add Row" to add a row for entering the rate.
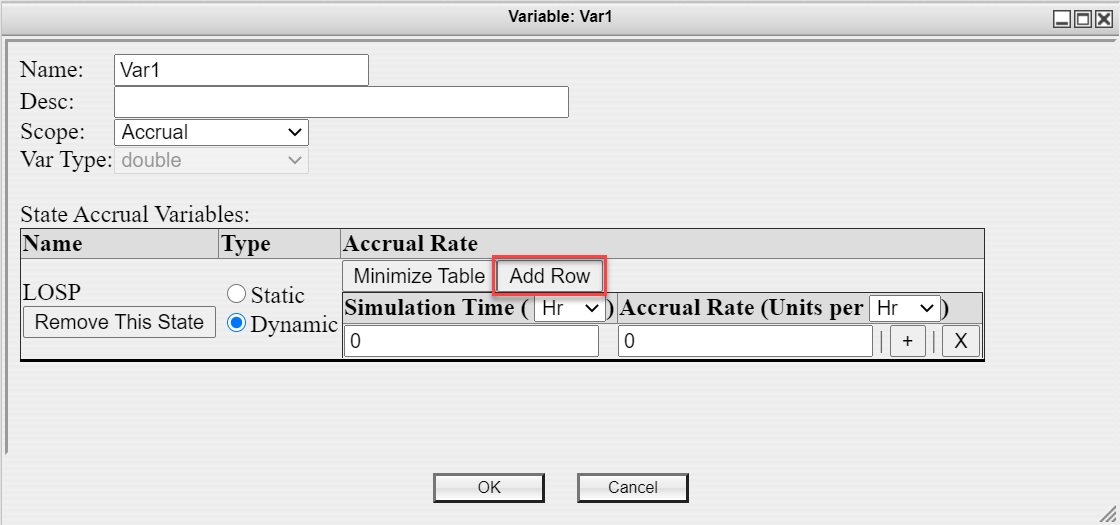
To add additional rows, click the [+] button on the right-hand side of the accrual rate field or the same "Add Row" button. Either method will add another row right below the first row.
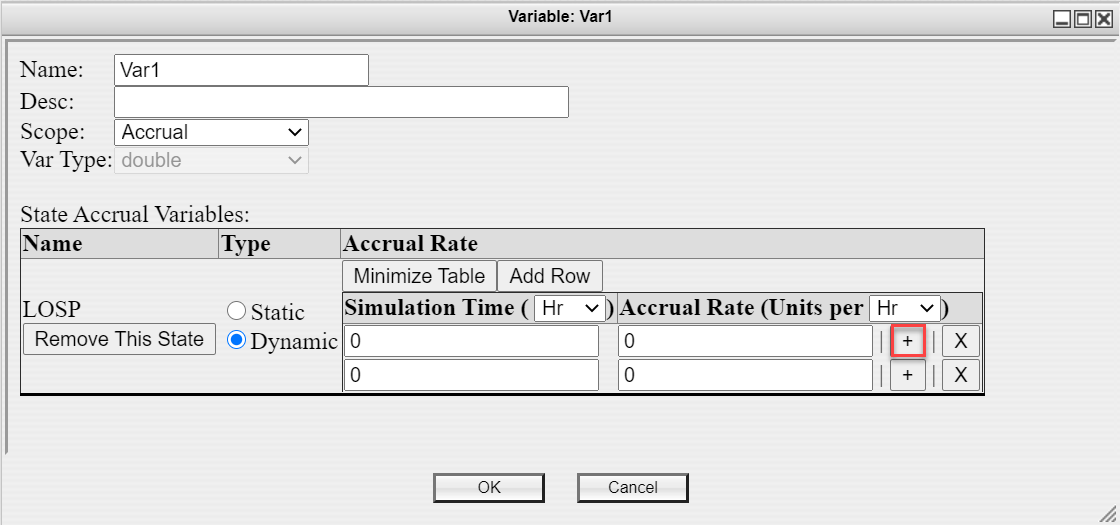
To delete a row, click the [X] button on the right-hand side of the the [+] button.
To collapse the rows for the state, click the "Minimize Table" button.
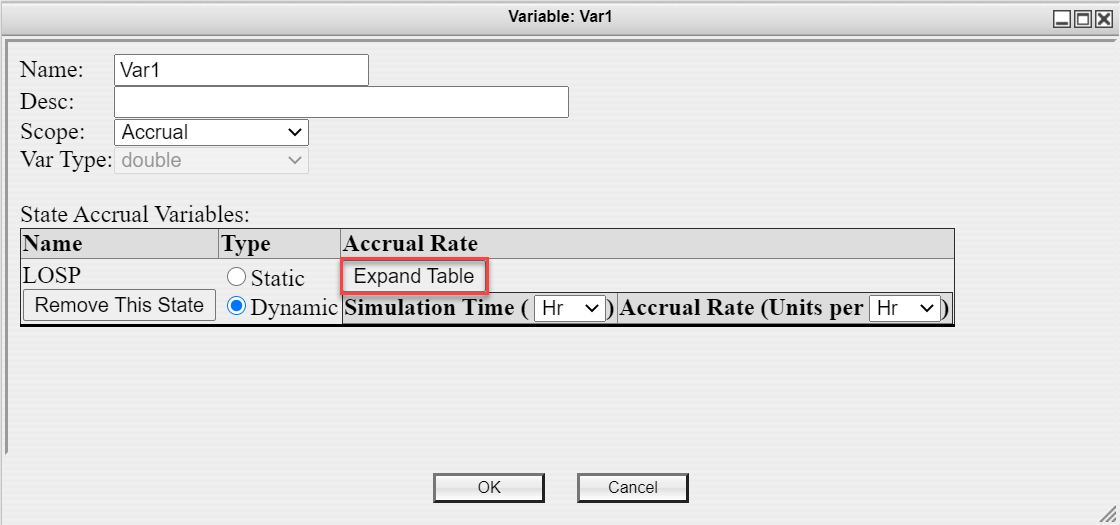
The button will change to an "Expand Table" button. Click it again to show all of the table rows.
To remove the state from the list entirely, click the "Remove This State" button under the name of the state. The window will look like the same as when the Accrual scope was chosen with an empty table.
# Variable Types
# Integer
In the dropdown menu for Var Type, integer variables are listed as, "int." To input a value, it can be typed or it can be incremented or decremented by one using the arrows on the right side of the field. These arrows appear when you mouse over the right end of the field.
# Double
To input the value of a double, it can be typed or it can be incremented or decremented by one using the arrows on the right side of the field. These arrows appear when you mouse over the right end of the field.
# Boolean
In the dropdown menu for Var Type, boolean variables are listed as, "bool." To input the value, a true or false value can be selected from the dropdown menu next to Value.
# String
To input a value of a string, a value should be typed into the text field next to Value.
# Error
If you type in a value that is not of the variable type selected, it will display an error. This error will also display if no value is put.
← Actions Logic Trees →